Showing posts with label Details. Show all posts

Thursday, May 21, 2009

Did you know? Napkins: The Finished Product

Drumroll please...........................
Here THEY are, my napkins! I love them! What do you think?


I ordered the napkins from my local BCD Promos (http://bcdpromos.com/default.aspx) supplier. BCD has great selection, it's almost too many choices, and the best prices I could find. Plus, they are super reliable.
I decided to do 2-ply beverage and dinner napkins in white with black printing. You might have noticed that the proofs I posted earlier included our accent color, chartreuse, and the actual photos above are monochromatic. Well, the 2 color printing was almost double the cost, and since these were pricy napkins anyway, I had to say no. I honestly think they turned out better in just black and white, what do you think?

The day after the wedding, I told my husband (heehee...it still gives me the giggles to say that) that I was surprised that no one said anything to me about the napkins because I was so in love with them. He laughed and said that people were coming up to him all night and saying how much they loved the napkins. Also, my aunts and mother said the same thing and they kept telling everyone that there were several types so try to see them all.
OVERALL REVIEW
COST: Expensive! 9 different designs=9 different setup expenses.
TIME: Just a few hours, could probably be done in one night.
DIFFICULTY: Not too bad, the worst part was coming up with the different sayings.
RELATED POSTS

Did you know? Napkins: The Setup

As I previously mentioned, I was working on the Did you know? napkins. Well, here's the skinny on the design and setup.

The hardest part was putting together all the facts for our napkins, I decided to do 9 designs, 4 for dinner napkins and 5 for cocktail napkins. I really wanted to keep the facts fun and lighthearted. As you can see from the images of the setup files below, I think I achieved my goal!

I am not a computer genius, so I typically use Microsoft Publisher for design projects and this was no exception. I used my previously created logo and simply typed the text below using my two wedding fonts: Feel Script and Century Gothic. It was a pretty easy process.

The next step was to convert the files to a vector based file. To do this, I downloaded the free trial of Adobe Illustrator from www.adobe.com and copied and pasted my designs from Publisher into Illustrator. Then, I followed these great instructions I found on www.weddingbee.com for vectorizing. By doing this work myself, I saved a $75 setup fee. It was definitely worth the time (about an hour).

I'll follow up soon with some pictures of the finished product! In the meantime, check out the images from the files I used for printing.


Sunday, January 11, 2009

The Inartistic Bride's Etsy Store

I've got big....no, HUGE news! Due the popularity of the Crystal Beaded Toothpicks featured on this blog, I have decided to sell them on Etsy.com!

Please check out my shop! I will be taking requests for colors, styles, etc.

http://www.etsy.com/shop.php?user_id=6751003

RELATED:
http://theinartisticbride.blogspot.com/2008/10/crystal-beaded-toothpicks.html

Wednesday, January 7, 2009

Did you know...? Napkins

The Winter 2009 issue of InStyle Weddings is on the shelves and my wonderful fiance brought me a copy. As usual, it delivers inspiration.

I instantly fell in love with the cocktail napkins from Christina Moore & John Ducey's wedding featured on page 307. The napkins had various funny little-known facts about the couple.

For example, "Christina has worn glasses since age 6. John wore corrective shoes when he was 6. Nerds find nerds." "Christina was crowned an Acteen Princess. John received a perfect attendance award. No, they did not "peak" in high school."

The picture isn't posted on the InStyle website yet and my scanner is broken, so here is a picture of the picture:


I loved this idea so much that I immediately began planning ours. I plan to have 10 different facts printed on the napkins....more to come!

Tuesday, November 25, 2008

I want MORE candy!


Here is a follow-up to my earlier post about bags for the candy bar.....

First, I realize that I left some product information out.

I used Color Box pigment ink pad in black ($3), Stamp n Stuff embossing powder in clear ($4) and a Marvy Heat embossing tool ($19.99-I think), all products came from Michael's.


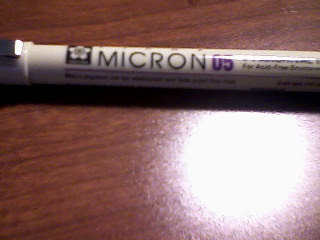
Additionally, I just learned from exploring at Michael's that there are pigment ink pens! This is SO much easier than the tiny paintbrush I mentioned earlier. Plus, the Micron .45mm black pen was reasonably priced at $2.99!


Lastly, after looking way too much at these bags, I decided they were missing something. So, I added a lime green ribbon looped through two holes to each bag. This will allow guests to tie the bag closed and it adds a pop of color!
For this, I used some chartreuse thin ribbon (50 cents for 10 yards) and a McGill 1/4 inch round hole punch ($5.99) from Michael's. It was very simple, I just punched two holes about 3/4 inch apart on the center of bag about 1/2 inch from the top of the bag and then threaded the ribbon through leaving the loose ends on the front of the bag.


Do you constantly add to your DIY to-do list too?

Monday, November 24, 2008

I want Candy!


We are having a candy bar at our wedding because my fiance is a huge candy freak, specifically m&m's. I ordered some bags from http://www.papermart.com/ (read review here) and they definitely needed to be beautified. The above picture is the end result--and I am so proud, I'm becoming crafty!!


INSTRUCTIONS

SUPPLIES
  • Paper Bags
  • Paper Cutter
  • Border Punch
  • Stamp Pigment Ink
  • Embossing Powder
  • Embossing Tool
    Tiny paintbrush (only required if you're a OCD perfectionist)
  1. I cut off about an inch from the top of the bag to get rid of the ugly number 2, using the paper cutter.
  2. Next, I used a border punch to add some interest to edge of the bags. I used the border punch pictured below by Fiskars from Michael's. I hate, hate, hate this thing! It broke very shortly after using and I had to reassemble it myself multiple times (it's missing a piece in the pic above). On the positive side, it is easy to line the paper up and get straight cuts.
  3. Next up is stamping. I used my logo stamp and black pigment ink. It's important to make sure you use pigment ink because dye-based ink dries too quickly for embossing. I had a really difficult time getting the stamp perfectly even and accurate throughout the logo, so I ended up using a tiny paintbrush dipped in the ink to perfect the stamped design. But as you can see below, many of the bags were beyond repair.
  4. Pour embossing powder on the stamped bag. I used clear powder, because even if a few sprinkles are left on the bag no one will know because they dry clear. Be sure to pour a lot of powder, think heaping mounds like the picture below. TIP: let the powder sit for a few minutes before dusting off the excess.
  5. Pour the remaining/excess powder onto the next bag or back into the container.
  6. Using your embossing tool, heat and melt the powder on the bag. It's really easy to tell when it's finished, the design will be shiny and raised.

That's it! You've embossed some gorgeous candy bar bags!


REVIEW
Cost: Ultra cheap!
Difficulty: Medium, there is definitely a learning curve
Time: a lot, but not as much as you think! I averaged about 15 minutes for 10 bags. My advice is to break it up into groups of 10 and do a little at a time.
Have you used embossing for any of you wedding techniques? What sort of bag/container are you using for your candy bar?

Sunday, November 23, 2008

Stamp of Approval


I just received my two custom stamps from http://impressrubberstamps.com/ and I am one satisfied customer! I ordered a custom 2 x 3 wood block stamp with my address in the lovely Feel script and a 5 x 5 wood block stamp for our logo. It was super easy to order, all I had to do was email a pdf (Thank you cute pdf) with the designs on it and 2 weeks later I had my two stamps. The quality seems to be good (but I don't know anything about stamps); I was worried about the complexity of our logo, but it stamps clearly. Plus, I thought the prices seemed reasonable!

Additionally, I feel very Martha right now. This was originally a Good Thing that I fell in love with awhile ago.


Are you planning on using stamps for any of your wedding projects? Or do you simply have a vendor to recommend? If so, leave a comment!

P.S. Don't you love the super cheesy pic at the top?

Thursday, October 30, 2008

Logo Follow Up


As I've mentioned before, I don't have a fancy design program. Yet, I was still able to create a logo/monogram for our wedding.

Inspired by Miss Sea Breeze over at Weddingbee, I have decided to talk more about the creation of our logos. I used Microsoft Publisher, it's a basic program that you should have and may not even know it. It's great at creating shapes, allowing you to play with fonts and alignments. You can even save your image as a picture by simply right-clicking.

Did you design your logo using a "basic" program?

P.S. Leave a comment if you need assistance using Publisher, I'd love to help!

Wednesday, October 29, 2008

A New Twist


I love this Good Things from Martha (of course). The only problem is the colors available at For Your Party don't really match our theme (and I'm a ruthless color/theme snob).

After months and months of scouring the internet and following dead end leads, I may have found someone to who can provide them in either black or white. It's a nice man in Taiwan and it will take over a month to produce them and get them to me in the Deep South.

I'll let you know how it goes and provide contact information at that time.
Has anyone done this project or something similar?

Friday, October 24, 2008

Too Plain?


I created this basic logo right after we got engaged, but lately I've been feeling that it is too plain. So I created a few more options.


What do you think? Which should I use? I'm leaning towards all of them. For example, maybe use the simple one on the invites and the more ornate logos for different DIY projects.

Wednesday, October 22, 2008

Envelope Guest Book


When I saw this Good Things several months ago, I knew immediately that I had to do it! I like this idea for several reasons:

  1. It's different
  2. It will give the guests the opportunity to write something besides their names if they choose
  3. It will hopefully speed up the guest book line by allowing more than one guest to sign their name at the same time.
  4. I'm already looking forward to opening all the envelopes after the honeymoon
SUPPLIES

  • Scrapbook
  • 12 x 12 card stock
  • Glue Stick
  • Scissors
  • Die-Cutter (not necessary, but makes it easier)
  • Envelope Die Cut
  • Square Die Cut
I got my black fabric scrapbook from Michael's for $12. I originally wanted a black silk dupioni album with our monogram, but the $90 price tag was too much for me.

I used all the Die Cut supplies mentioned in my previous post.

I bought all my card stock from Michael's. I am using the black and white linen 12x12 sheets for everything. The official names are Solar White and Charcoal Black. TIP: Figure out how much you need before you go! I went 4 times for all the card stock!

I used two different types of glue. First, I used the Michael's brand glue stick for glue the envelopes closed and Elmer's Memory Book Glue Pen for pasting the envelopes to the backer sheet.

If you're using the same die cuts, here are some helpful size tips: 6 envelopes can be made per 12x12 page; 21-23 square envelope inserts per 12x12 page and 9 envelopes displayed per 12x12 page.

I choose to use the same size envelope throughout the book because I like uniformity and it was easier. I used alternating colors with black envelopes and inserts on white backer sheets and vice versa to spice it up some. I am alternating black and white pages throughout the book. I also plan to make some stickers to seal the envelope in our accent color, lime green to add some color.

Here are some pics....

OVERALL REVIEW
Difficulty: Really low

Labor: Medium

Price: Low, pretty much just paper and glue.